 Axios
Axios
Axios
Reference
Axios 简介
定义
Axios 是一个基于 promise 的 HTTP 库,可以用在浏览器和 node.js 中。
特性
- 浏览器端发起 XMLHttpRequests 请求
- node 端发起 http 请求
- 支持 Promise API
- 监听请求和返回
- 转化请求和返回
- 取消请求
- 自动转化 json 数据
- 客户端支持抵御
安装
npm install axios --save
或者使用 cdn
<script src="https://unpkg.com/axios/dist/axios.min.js"></script>
基本使用
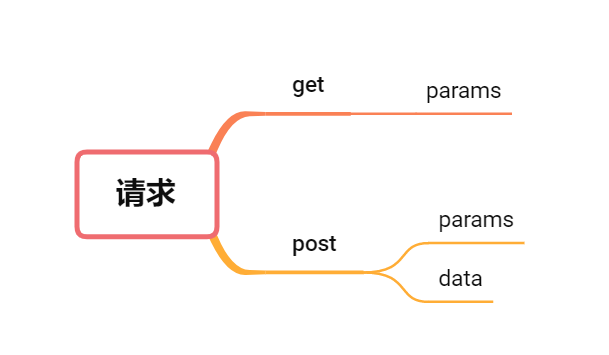
Get 请求
axios({
    method: 'GET',
    url: 'xxxxx',
    params: param,
  })
.then(function (response) {
  console.log(response);
}).catch(function (error) {
  console.log(error)
}
或者
axios({
    method: 'GET',
    url: '/xxx?message=' + msg,
  })
.then(function (response) {
  console.log(response);
}).catch(function (error) {
  console.log(error)
}
2
3
4
5
6
7
8
9
10
11
12
13
14
15
16
17
18
19
20
params 形式
**基础类型接收,名字对应即可**
// method
const params = {
    id: '123456789',
    name: '张三'
}
test(params)

// api
export function test (params) {
  return axios({
    url: url,
    method: 'GET',
    params: params
  })
}

// 后台
@GetMapping("/test")
public Result test(Long id, String name) {
    return Res.ok();
}
2
3
4
5
6
7
8
9
10
11
12
13
14
15
16
17
18
19
20
21
**使用 Map 接收,需要添加 RequestParam 注解
// method
const params = {
    id: '123456789',
    name: '张三'
}
test(params)

// api
export function test (params) {
  return axios({
    url: url,
    method: 'GET',
    params: params
  })
}

// 后台
@GetMapping("/test")
public Result test(@RequestParam Map<String, Object> map) {
    return Res.ok();
}
2
3
4
5
6
7
8
9
10
11
12
13
14
15
16
17
18
19
20
21
**使用实体类接收**
// 实体类
@Data
public class TestEntity {
    Long id;
    String name;
}

// method
const params = {
    id: '123456789',
    name: '张三'
}
test(params)

// api
export function test (params) {
  return axios({
    url: url,
    method: 'GET',
    params: params
  })
}

// 后台
@GetMapping("/test")
public Result test(TestEntity testEntity) {
    return Res.ok();
}
2
3
4
5
6
7
8
9
10
11
12
13
14
15
16
17
18
19
20
21
22
23
24
25
26
27
28
Post 请求
axios({
  method: 'POST',
  url: '/xxxxx',
  data: param,
})
或者
axios({
  method: 'POST',
  url: '/xxxxx',
  params: param,
})
axios
  .post('/user', {
    name: 'krislin',
    address: 'china',
  })
  .then(function (response) {
    console.log(response)
  })
  .catch(function (error) {
    console.log(error)
  })
2
3
4
5
6
7
8
9
10
11
12
13
14
15
16
17
18
19
20
21
22
data 形式
**使用实体类接收**
// 实体类
@Data
public class TestEntity {
    Long id;
    String name;
}

// method
const params = {
    id: '123456789',
    name: '张三'
}
test(params)

// api
export function test (params) {
  return axios({
    url: url,
    method: 'POST',
    data: params
  })
}

@PostMapping("/test")
public Result test(@RequestBody TestEntity testEntity) {
    return Res.ok();
}
2
3
4
5
6
7
8
9
10
11
12
13
14
15
16
17
18
19
20
21
22
23
24
25
26
27
params 形式
**基础类型接收,名字对应即可**
// method
const params = {
    id: '123456789',
    name: '张三'
}
test(params)

// api
export function test (params) {
  return axios({
    url: url,
    method: 'POST',
    params: params
  })
}

// 后台
@PostMapping("/test")
public Result test(Long id, String name) {
    return Res.ok();
}
2
3
4
5
6
7
8
9
10
11
12
13
14
15
16
17
18
19
20
21
**使用 map 接收**
// method
const params = {
    id: '123456789',
    name: '张三'
}
test(params)

// api
export function test (params) {
  return axios({
    url: url,
    method: 'POST',
    params: params
  })
}

// 后台
@PostMapping("/test")
public Result test(@RequestParam Map<String, Object> map) {
    return Res.ok();
}
2
3
4
5
6
7
8
9
10
11
12
13
14
15
16
17
18
19
20
21
**使用实体类接收**
// 实体类
@Data
public class TestEntity {
    Long id;
    String name;
}

// method
const params = {
    id: '123456789',
    name: '张三'
}
test(params)

// api
export function test (params) {
  return axios({
    url: url,
    method: 'POST',
    params: params
  })
}

// 后台
@PostMapping("/test")
public Result test(TestEntity testEntity) {
    return Res.ok();
}
2
3
4
5
6
7
8
9
10
11
12
13
14
15
16
17
18
19
20
21
22
23
24
25
26
27
28
总结
- 使用
paramsget 与 post 请求基本是一样使用的,如果参数名与传递名称不一致,需要使用@RequestParam修饰 - 若使用 Map 接收参数,必须使用
@RequestParam修饰 - 但是如果想传
list类型的数据,需要使用单独的方法处理(参考链接 (opens new window)) - 若使用
data传递参数,需要添加注解@RequestBody进行修饰。
并发操作
function getUserAccount() {
  return axios.get('/user/12345')
}

function getUserPermissions() {
  return axios.get('/user/12345/permissions')
}

axios.all([getUerAccount(), getUserPermissions()]).then(
  axios.spread(function (acc, pers) {
    //两个请求现在都完成
  })
)
2
3
4
5
6
7
8
9
10
11
12
13
请求 API 配置
axios 能够在进行请求时进行一些设置,具体如下:
axios({
  method: 'post',
  url: '/user/12345',
  data: {
    name: 'krislin',
    address: 'china',
  },
})
2
3
4
5
6
7
8
请求设置
请求配置中,只有 url 是必须的,如果没有指明的话,默认是 Get 请求
{
    //`url`是服务器链接,用来请求用
    url:'/user',

    //`method`是发起请求时的请求方法
    method:`get`,

    //`baseURL`如果`url`不是绝对地址,那么将会加在其前面。
    //当axios使用相对地址时这个设置非常方便
    //在其实例中的方法
    baseURL:'http://some-domain.com/api/',

    //`transformRequest`允许请求的数据在传到服务器之前进行转化。
    //这个也支持`PUT`,`GET`,`PATCH`方法。
    //数组中的最后一个函数必须返回一个字符串,一个`ArrayBuffer`,或者`Stream`
    transformRequest:[function(data){
        //依自己的需求对请求数据进行处理
        return data;
    }],

    //`transformResponse`允许返回的数据传入then/catch之前进行处理
    transformResponse:[function(data){
        //依需要对数据进行处理
        return data;
    }],

    //`headers`是自定义的要被发送的头信息
    headers:{'X-Requested-with':'XMLHttpRequest'},

    //`params`是请求连接中的请求参数,必须是一个纯对象,或者URLSearchParams对象
    params:{
        ID:12345
    },

    //`paramsSerializer`是一个可选的函数,是用来序列化参数
    //例如:(https://ww.npmjs.com/package/qs,http://api.jquery.com/jquery.param/)
    paramsSerializer: function(params){
        return Qs.stringify(params,{arrayFormat:'brackets'})
    },

    //`data`是请求提需要设置的数据
    //只适用于应用的'PUT','POST','PATCH',请求方法
    //当没有设置`transformRequest`时,必须是以下其中之一的类型(不可重复?):
    //-string,plain object,ArrayBuffer,ArrayBufferView,URLSearchParams
    //-仅浏览器:FormData,File,Blob
    //-仅Node:Stream
    data:{
        firstName:'fred'
    },
    //`timeout`定义请求的时间,单位是毫秒。
    //如果请求的时间超过这个设定时间,请求将会停止。
    timeout:1000,

    //`withCredentials`表明是否跨域请求,
    //应该是用证书
    withCredentials:false //默认值

    //`adapter`适配器,允许自定义处理请求,这会使测试更简单。
    //返回一个promise,并且提供验证返回(查看[response docs](#response-api))
    adapter:function(config){
        /*...*/
    },

    //`auth`表明HTTP基础的认证应该被使用,并且提供证书。
    //这个会设置一个`authorization` 头(header),并且覆盖你在header设置的Authorization头信息。
    auth:{
        username:'janedoe',
        password:'s00pers3cret'
    },

    //`responsetype`表明服务器返回的数据类型,这些类型的设置应该是
    //'arraybuffer','blob','document','json','text',stream'
    responsetype:'json',

    //`xsrfHeaderName` 是http头(header)的名字,并且该头携带xsrf的值
    xrsfHeadername:'X-XSRF-TOKEN',//默认值

    //`onUploadProgress`允许处理上传过程的事件
    onUploadProgress: function(progressEvent){
        //本地过程事件发生时想做的事
    },

    //`onDownloadProgress`允许处理下载过程的事件
    onDownloadProgress: function(progressEvent){
        //下载过程中想做的事
    },

    //`maxContentLength` 定义http返回内容的最大容量
    maxContentLength: 2000,

    //`validateStatus` 定义promise的resolve和reject。
    //http返回状态码,如果`validateStatus`返回true(或者设置成null/undefined),promise将会接受;其他的promise将会拒绝。
    validateStatus: function(status){
        return status >= 200 && stauts < 300;//默认
    },

    //`httpAgent` 和 `httpsAgent`当产生一个http或者https请求时分别定义一个自定义的代理,在nodejs中。
    //这个允许设置一些选选个,像是`keepAlive`--这个在默认中是没有开启的。
    httpAgent: new http.Agent({keepAlive:treu}),
    httpsAgent: new https.Agent({keepAlive:true}),

    //`proxy`定义服务器的主机名字和端口号。
    //`auth`表明HTTP基本认证应该跟`proxy`相连接,并且提供证书。
    //这个将设置一个'Proxy-Authorization'头(header),覆盖原先自定义的。
    proxy:{
        host:127.0.0.1,
        port:9000,
        auth:{
            username:'cdd',
            password:'123456'
        }
    },

    //`cancelTaken` 定义一个取消,能够用来取消请求
    //(查看 下面的Cancellation 的详细部分)
    cancelToke: new CancelToken(function(cancel){
    })
}
2
3
4
5
6
7
8
9
10
11
12
13
14
15
16
17
18
19
20
21
22
23
24
25
26
27
28
29
30
31
32
33
34
35
36
37
38
39
40
41
42
43
44
45
46
47
48
49
50
51
52
53
54
55
56
57
58
59
60
61
62
63
64
65
66
67
68
69
70
71
72
73
74
75
76
77
78
79
80
81
82
83
84
85
86
87
88
89
90
91
92
93
94
95
96
97
98
99
100
101
102
103
104
105
106
107
108
109
110
111
112
113
114
115
116
117
118
响应数据 Response
一个请求的返回包含以下信息
{
    //`data`是服务器的提供的回复(相对于请求)
    data{},

    //`status`是服务器返回的http状态码
    status:200,


    //`statusText`是服务器返回的http状态信息
    statusText: 'ok',

    //`headers`是服务器返回中携带的headers
    headers:{},

    //`config`是对axios进行的设置,目的是为了请求(request)
    config:{}
}
2
3
4
5
6
7
8
9
10
11
12
13
14
15
16
17
拦截器 Interceptors
你可以在 请求 或者 返回 被 then 或者 catch 处理之前对他们进行拦截。
添加拦截器:
//添加一个请求拦截器
axios.interceptors.request.use(
  function (config) {
    //在请求发送之前做一些事
    return config
  },
  function (error) {
    //当出现请求错误是做一些事
    return Promise.reject(error)
  }
)

//添加一个返回拦截器
axios.interceptors.response.use(
  function (response) {
    //对返回的数据进行一些处理
    return response
  },
  function (error) {
    //对返回的错误进行一些处理
    return Promise.reject(error)
  }
)
2
3
4
5
6
7
8
9
10
11
12
13
14
15
16
17
18
19
20
21
22
23
移除拦截器:
var myInterceptor = axios.interceptors.request.use(function () {
  /*...*/
})
axios.interceptors.rquest.eject(myInterceptor)
2
3
4
跨域
因为在 Vue 的开发阶段,基本都是用 webpack 打包编译,需要 node 环境本地运行,因而运行的域名为本地的 localhost,这个时候调用后端接口就涉及到跨域的问题了。
ProxyTable
vue 的 proxyTable 是用于开发阶段配置跨域的工具,可以同时配置多个后台服务器跨越请求接口,其真正依赖的 npm 包是 http-proxy-middleware (opens new window), 在 GitHub 上拥有更丰富的配置,可以按需配置
在不考虑后端 CROS 跨域方案的情况下,前端配置 ProxyTable 实现跨域请求的用法如下:
1. 找到 config/index.js 文件中的 proxyTable:{} 将其修改
proxyTable: {
  '/api': {
    target: 'https://tasst.sinoxk.cn', // 这个是你要代理的地址(开发阶段接口地址)
    changeOrigin: true, //跨域需要加上这个
    pathRewrite: {
      '^/api': '' //可以理解为用 / api代表target里的地址
    }
  }
}
2
3
4
5
6
7
8
9
proxyTable 支持配置多个接口:
proxyTable: {
  '/api': {
    target: 'https://tasst.sinoxk.cn', // 这个是你要代理的地址(开发阶段接口地址)
    changeOrigin: true, //跨域需要加上这个
    pathRewrite: {
      '^/api': '' //可以理解为用 / api代表target里的地址
    }
  },
   '/service': {
    target: 'https://tasst.sinoxk.cn', // 这个是你要代理的地址(开发阶段接口地址)
    changeOrigin: true, //跨域需要加上这个
    pathRewrite: {
      '^/service': '' //可以理解为用 / api代表target里的地址
    }
  }
}
2
3
4
5
6
7
8
9
10
11
12
13
14
15
16
2. 找到 config/dev.env.js 文件,配置BASE_URL
module.exports = merge(prodEnv, {
  NODE_ENV: '"development"',
  BASE_URL: '"/api"', //开发环境域名
})
2
3
4
3. 找到 config/prod.env.js 文件,配置BASE_URL
module.exports = {
  NODE_ENV: '"production"',
  BASE_URL: '"https://asst.sinoxk.com"', //生产环境保持正式域名
}
2
3
4
4. 配置 axios 的基础域名
axios.defaults.baseURL = process.env.BASE_URL
修改完所有的配置文件后,要注意,需要重启下环境
npm run dev / npm run start
封装
在日常项目开发过程中,在和后台交互获取数据的时候,我们都需要使用到网络库,通常在 vue 的项目中 ,使用的是 axios 库 ,在此基于自身项目业务,做一个二次封装。
条件准备
在 UI 轻提示组件上,选定的是 vant 库中的 Toast 组件(Vant 文档 (opens new window)),可按实际需要选定具体要使用的 UI 框架
安装:
npm install vant --save
数据序列化,如果有实际需要的项目,可以使用qs,在这里做一个简单的介绍
安装:
npm install qs --save
qs.stringify 和 JSON.stringify 的使用和区别
qs.stringify()将对象序列化成 URL 的形式,以&进行拼接
JSON.stringify 是将对象转化成一个 json 字符串的形式
用法:
var a = { name: 'xiaoming', age: 10 }

qs.stringify(a) //log: 'name=xiaoming&age=10'

JSON.stringify(a) //log: '{"name":"hehe","age":10}'
2
3
4
5
基于底层配置和业务接口分离,在 src 目录中会新建文件夹 httpServer,同时新建立 ajax.js 和 api.js 文件
ajax.js: axios的二次封装,作为基础网络库,添加基础的配置
api.js: 管理项目实际业务基础接口的输出,以及返回响应数据的处理
在日常项目模块中,基于多人开发,当然可以在 api.js 的基础上,可以根据功能模块实现业务拓展延伸,比如
小明负责list模块业务

新建api-list.js,并导入api.js ....

//api-list.js文件中:
import api from './api'

export default {
    getList(url,params){
        api.get(url,params)
    }
}
2
3
4
5
6
7
8
9
10
11
12
对于个别项目,可能存在多个域名配置的情况下, 可以重新建立 base.js , 来管理多个接口域名
base.js:
/**
 * 接口域名的管理
 */
const base = {
  sq: 'https://xxxx111111.com/api/v1',
  bd: 'http://xxxxx22222.com/api',
}

export default base
2
3
4
5
6
7
8
9
axios 封装(单域名)
src/main.js 文件:
import Vue from 'vue'
import App from './App'
import router from './router'
import Api from './httpServer/api'

//挂载到vue的全局属性上
Vue.prototype.$https = Api

Vue.config.productionTip = false

new Vue({
  el: '#app',
  router,
  components: { App },
  template: '<App/>',
})
2
3
4
5
6
7
8
9
10
11
12
13
14
15
16
src/httpServer/ajax.js 文件:
import axios from 'axios'
import { Toast } from 'vant'

const ajax = axios.create({
  timeout: 60000,
  baseURL: process.env.BASE_URL, //基础域名
})

/**
 * 请求拦截器
 * 每次请求前,如果存在token则在请求头中携带token
 */
ajax.interceptors.request.use(
  config => {
    //判断token(根据实际情况拦截)

    return config
  },
  error => Promise.error(error)
)

/**
 * 响应拦截器
 */
ajax.interceptors.response.use(
  // 请求成功
  res => (res.status === 200 ? Promise.resolve(res) : Promise.reject(res)),
  error => {
    const { response } = error
    if (response) {
      // 请求已发出,但是不在2xx的范围
      Toast({ message: response.message })
      return Promise.reject(response)
    } else {
      // 处理断网的情况
      // eg:请求超时或断网时,更新state的network状态
      // network状态在app.vue中控制着一个全局的断网提示组件的显示隐藏
      // 关于断网组件中的刷新重新获取数据,会在断网组件中说明
      Toast({ message: '网络开小差,请稍后重试' })
    }
  }
)

export default ajax
2
3
4
5
6
7
8
9
10
11
12
13
14
15
16
17
18
19
20
21
22
23
24
25
26
27
28
29
30
31
32
33
34
35
36
37
38
39
40
41
42
43
44
对于process.env.BASE_URL的配置,在开发环境中,需要以代理的方式进行访问:
//config/dev.env.js

'use strict'
const merge = require('webpack-merge')
const prodEnv = require('./prod.env')

module.exports = merge(prodEnv, {
  NODE_ENV: '"development"',
  BASE_URL: '"/api"', //对api进行处理
})
2
3
4
5
6
7
8
9
10
//config/prod.env.js

'use strict'
module.exports = {
  NODE_ENV: '"production"',
  BASE_URL: '"https://www.xxx.com"', //生产环境不需要处理
}
2
3
4
5
6
7
//config/index.js
...

   proxyTable: {
       '/api': {
        target: 'https://tasst.sinoxk.cn',//后端接口地址
        changeOrigin: true,//是否允许跨越
        pathRewrite: {
          '^/api': '',//重写(接口地址带api会被替换)
        },
      }
    },
...
2
3
4
5
6
7
8
9
10
11
12
13
src/httpServer/api.js 文件:
import ajax from './ajax'
import { Toast } from 'vant'

/**
 *  业务接口成功或者失败的情况处理
 *
 */
const handleResponse = (res, success, failure) => {
  switch (res.code) {
    case 200: //成功
      success && success(res.data)
      break
    case 401: //登录token失效
      break
    default:
      if (failure) {
        failure(res)
      } else {
        Toast({ message: res.msg || '请求失败,请稍后重试!' })
      }
      break
  }
}

export default {
  get: function (url, params, success, failure) {
    ajax
      .get(url, {
        params: params,
      })
      .then(res => {
        if (res.status == 200) {
          handleResponse(res.data.data, success, failure)
        }
      })
  },

  post: function (url, params, success, failure) {
    ajax.post(url, params).then(res => {
      if (res.status == 200) {
        handleResponse(res.data.data, success, failure)
      }
    })
  },
}
2
3
4
5
6
7
8
9
10
11
12
13
14
15
16
17
18
19
20
21
22
23
24
25
26
27
28
29
30
31
32
33
34
35
36
37
38
39
40
41
42
43
44
45
在src/components/HelloWorld.vue文件中使用:
<script>
  export default {
    name: 'HelloWorld',
    data() {
      return {
        msg: 'Welcome to Your Vue.js App'
      }
    },
    created() {
     //请求接口数据
      this.$https.get('/xkzx/member/service', {
        pageNum: 1,
        pageSize: 10
      }, function (data) { //成功
         console.log(data);

      }, function (res) {  //失败

      })

    }
  }
</script>
2
3
4
5
6
7
8
9
10
11
12
13
14
15
16
17
18
19
20
21
22
23